
Organizing Customer Info in a Sales CRM with Talkty
Learn how to organize customer information in a sales CRM with Talkty using customer cards, custom fields, sales stages, and clear record layouts.
By Emily Carter · · 6 min read ·

Keeping customer details useful means making them easy to find and linking them to the right sales opportunity. Organizing customer info in a sales CRM starts with clear stages, relevant fields, and records your team can scan quickly.
How Talkty organizes customer and opportunity information
In Talkty, the Sales CRM is a sales flow made up of columns. Each customer or request is an opportunity that moves through the stages of your process, such as New, Called, Appointment booked, Attended, Won, or Lost. A new person who contacts you through WhatsApp, Instagram, or web chat will usually have an opportunity opened automatically. To add one yourself, select New customer.
Choose Columns or List beside the page title. In Columns view, each stage has its own panel. The column header shows its name and opportunity count, and may show a total value when the opportunities use the same currency. List view displays opportunities in a table that you can sort and export.
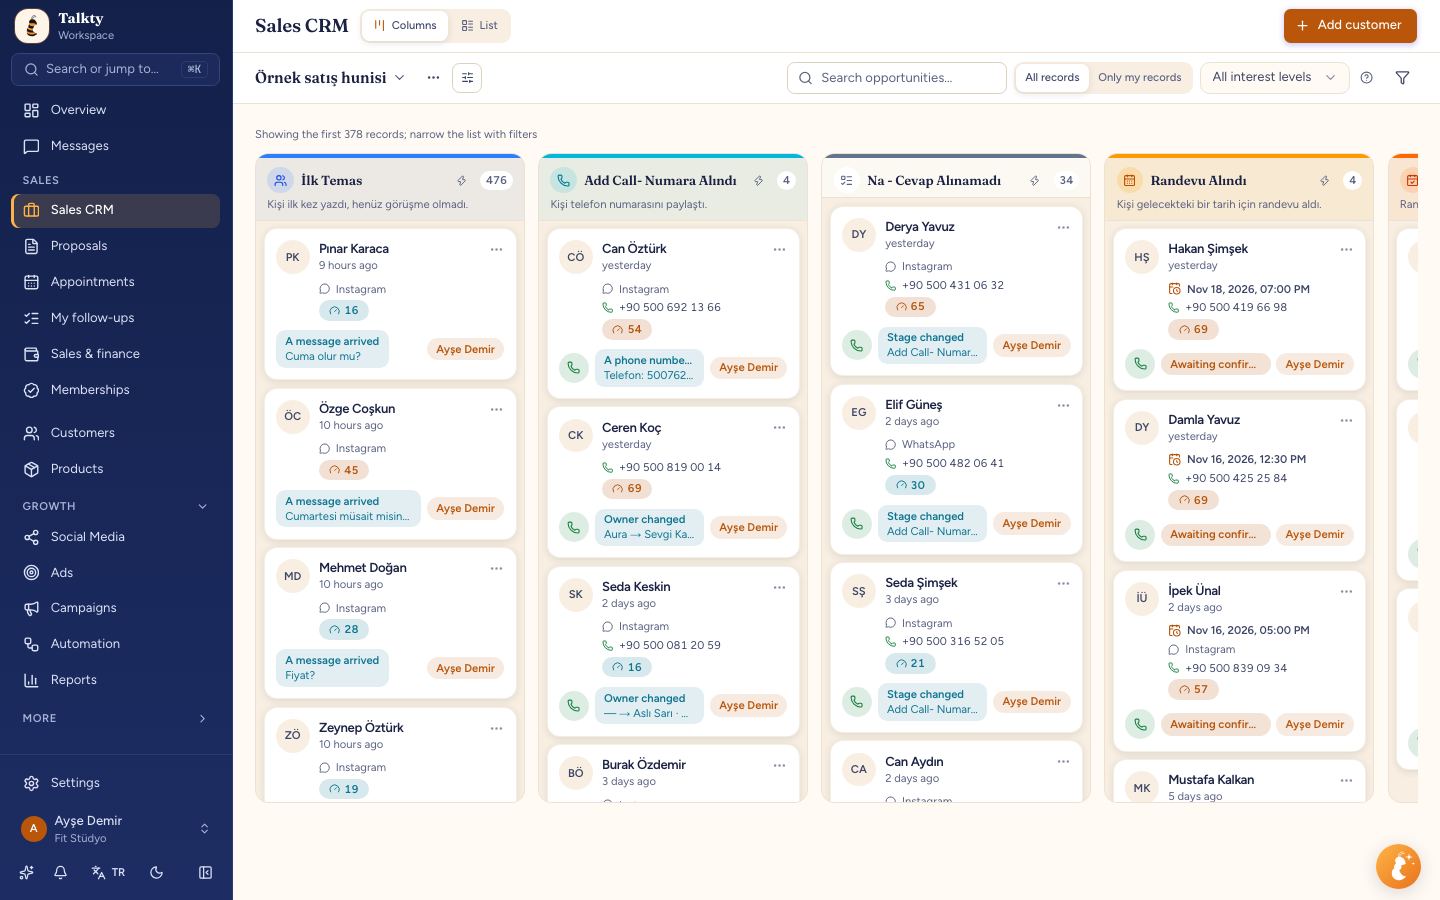
Click an opportunity to open its panel and review its information. You can also choose which details appear on its card. In Columns view, select the settings icon beside the sales flow name. Set fields to appear at the Top, Middle, or Bottom, or choose Hidden. Use the arrows to change their order, then select Save. The layout applies to opportunities in every sales flow but is stored only for you, so it does not change what teammates see. Select Reset to default to restore the original layout.
Add fields that fit the information you collect
Talkty lets you create custom fields for opportunities, customers, companies, and products. These fields help you record information that matters to your business rather than relying on a one-size-fits-all set of details.
Open the Custom fields tab, choose the record type, and select New field. Enter a field name, choose a type—such as text, number, date, choice list, or yes/no—and select Create field. You can also use Ready-made field library to add a set of fields for a listed industry. Existing fields are skipped, and you can edit or delete fields that are added.
Custom fields appear on the relevant customer or opportunity screens and can be used in filters and reports. Some fields can also be filled from information the opportunity already has, depending on the field's data source. Deleting a field deletes its saved answers too.
To ask for information when an opportunity reaches a particular stage, open that column's header menu and select Edit column. Under Required fields, choose the extra information to request when someone manually moves an opportunity into the column. Under Opportunity details, you can also require details such as customer name, phone, email, or appointment date. If a detail is already available, it is filled in; otherwise, the form asks for it. These requirements apply to manual moves. Opportunities moved by AI or automations do not wait for the form.
Keep sales stages and card details consistent
Use columns that reflect the steps in your actual sales process. To edit a column, open its header menu and select Edit column. You can change its name, colour, icon, and type. Column type is important because AI and automations use it to identify the stage even if you change the displayed name.
Column settings also let you hide a column from non-managers with Hide from reps and set how many opportunities load when the board opens. You can restrict manual moves into a column by selecting other columns under Which columns can't move opportunities into this one? This restriction works in one direction; AI and automations ignore it.
If a stage needs specific information, configure its required fields in Edit column. For follow-up columns, you can choose which follow-up details are requested when an opportunity moves there. This keeps the information request connected to the stage where your team needs it.
Connect conversations to CRM opportunities
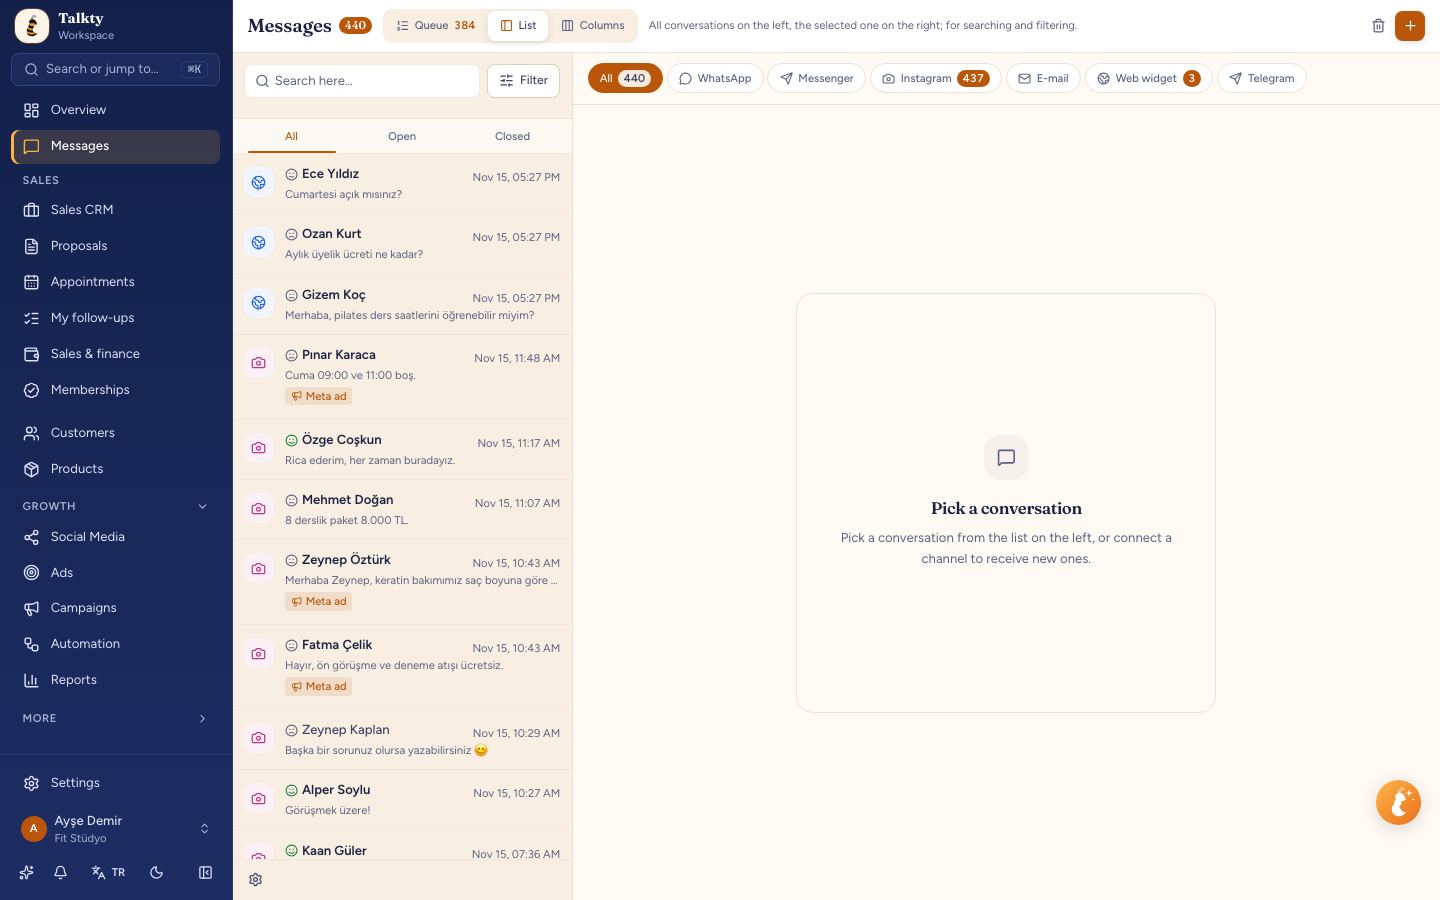
Talkty's shared inbox brings WhatsApp, Instagram, Messenger, and web chat conversations into one list. Team members can assign and tag conversations, helping them identify who is handling a message and what it concerns. A new contact from WhatsApp, Instagram, or web chat will usually have an opportunity opened automatically in the Sales CRM.
The card layout can also show Last updated by and Booked by. Last updated by identifies who performed the latest action on the opportunity. It may show AI or a teammate's name, depending on who opened or moved the opportunity, booked an appointment, or made a change. Booked by identifies who booked the opportunity's appointment. Both details are hidden on cards by default, so add them to the layout if they are useful to your team.
Step-by-step: organize a customer record
- Open the Sales CRM. Choose Columns for a stage-by-stage board or List for a sortable table.
- Create or find an opportunity. Select New customer to add one manually, or find the opportunity opened from a new WhatsApp, Instagram, or web chat contact.
- Create the fields you need. Open the Custom fields tab, choose the record type, select New field, and create relevant fields for your process.
- Arrange the card. In Columns view, select the settings icon beside the sales flow name. Choose which details to show and where to place them, then select Save.
- Set up stage-specific information. Open a column's header menu, select Edit column, and choose any fields to request under Required fields.
- Move the opportunity through your sales flow. Place it in the column that reflects its current stage. Complete any required fields when making a manual move.
- Review the record. Click the opportunity to open its panel and check the customer information and activity details available there.
Review appointments in the calendar
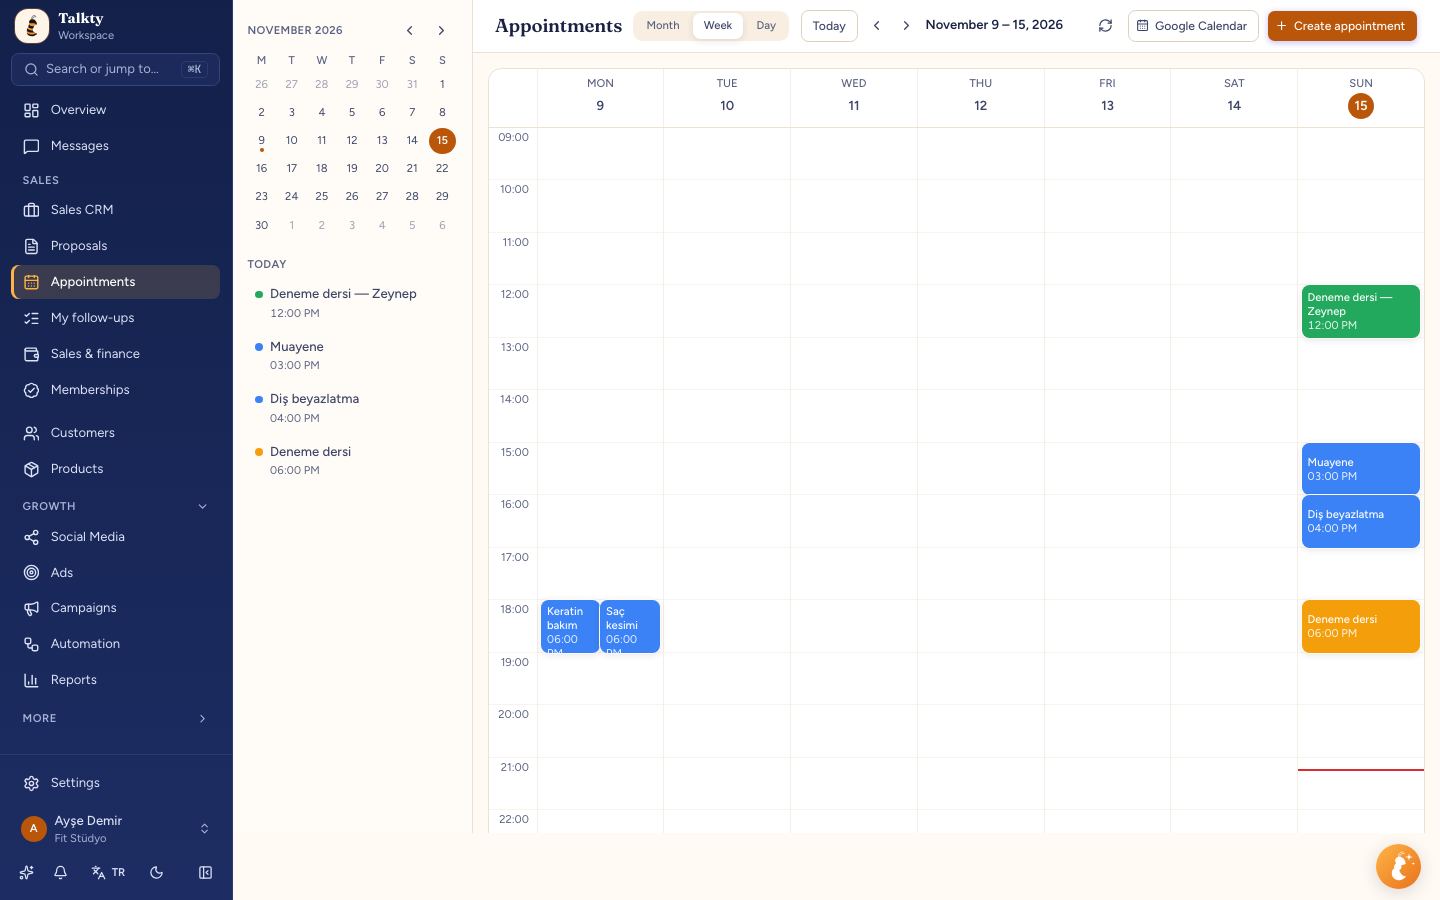
Appointments booked by your team or the AI assistant appear in one calendar. This gives your team a shared place to review scheduled appointments alongside the opportunities in the sales flow.
Talkty's AI assistant is trained on your website and documents. It can answer questions about prices, hours, and packages, and hand the conversation to your team when needed. This can help keep customer questions connected to the same conversations and opportunities your team manages in Talkty.
Summary
Organize customer information by placing each opportunity in the right sales stage, creating custom fields for the details your business needs, and arranging cards so important information is easy to scan. Talkty also connects conversations from WhatsApp, Instagram, Messenger, and web chat in a shared inbox, while its calendar brings appointments booked by your team or AI assistant into one view.
Frequently asked questions
- What is an opportunity in Talkty's Sales CRM?
- An opportunity is a customer or request moving through the stages of a sales flow. New contacts from WhatsApp, Instagram, or web chat will usually have an opportunity opened automatically.
- How do I add custom information to a customer or opportunity?
- Open the Custom fields tab, choose a record type, select New field, enter a name and field type, then select Create field.
- Can I choose which details appear on Sales CRM cards?
- Yes. In Columns view, select the settings icon beside the sales flow name. Choose which fields to show and where to place them, then select Save.
- Can I require information when an opportunity changes stage?
- Yes. Open the column's header menu, select Edit column, and choose fields under Required fields. The form is requested for manual moves into that column.
- Where can I see appointments booked by my team or the AI assistant?
- They appear in Talkty's calendar.
Emily Carter